


What Is Bead Rolling and How Does It Work?

Updated: Oct 11
Bead rolling is a sheet metal forming process used to create raised or recessed lines, channels, ribs, patterns, and other shapes in metal. A sheet of metal is passed between two shaped wheels, called dies, which press against opposite sides of the metal. As the

sheet passes between them, the dies form the metal into a specific shape. Different dies create different profiles, allowing a bead roller to be used for everything from strengthening a flat panel to creating decorative patterns and detailed designs.
Bead rolling can be functional, decorative, or both. A large, flat piece of sheet metal can flex fairly easily. Forming beads or patterns into the panel can add rigidity without simply using thicker and heavier material. A good example is an automotive floorboard, where formed ribs and patterns can help stiffen the panel and reduce flex.
Bead rolling is also widely used in the custom automotive world. Fabricators use bead

rollers to create custom door panels, floorboards, firewalls, interior panels, covers, filler panels, and other one-off pieces for custom cars and trucks. On a custom or show vehicle, the bead work can add rigidity while also becoming part of the overall design.
Bead rollers can be used with different types of sheet metal, including steel, aluminum, copper, and brass. Different materials and thicknesses behave differently and can require different techniques.
Like most forms of metalworking, there are different ways to approach bead rolling. What I'm sharing here isn't meant to be the only way to do it. It's simply how I do it and what works for me at Stanix Garage.

How I Use a Bead Roller at Stanix Garage
At Stanix Garage, I primarily use my bead roller to create custom signs, designs, and metal art. I currently work exclusively with aluminum because it's the material I've learned to work with and understand.
I haven't bead rolled steel, copper, or brass yet. Those are materials I may work with in the future, but I haven't learned how to roll them yet. For my work, I use the bead roller almost like a drawing tool. The dies physically form the lines of the artwork into the aluminum as I guide the sheet through the machine.
It Starts With the Design

There are several ways to transfer a design onto sheet metal. Some bead rollers use a projector to project an image directly onto the material and then trace or sketch the design onto the metal.
I use a vinyl plotter.
I take the artwork and put it into my vinyl plotting software, which traces the design and converts it

into something my plotter can cut. The plotter cuts the design out of vinyl, essentially creating a large sticker of the artwork.
I process the vinyl and apply it directly to the aluminum. Once everything is positioned where I want it, I trace the design with a Sharpie and remove the vinyl. The Sharpie lines left on the bare aluminum become my guide for bead

rolling.
Why Do I Remove the Vinyl?
One question I get is why I don't simply leave the vinyl on the aluminum and follow the design with the bead roller.
The biggest reason is that I need to see what the metal is doing

while I'm working it. Leaving the vinyl on makes it more difficult to see how the aluminum is forming.
The vinyl can also stretch, distort, and deform as the metal is being formed, making it less accurate as a guide. Removing it allows me to clearly see both my Sharpie lines and the aluminum while I'm rolling.
The Bead Roller and Dies I Use

My machine is an Eastwood 36-inch motorized bead roller. It's controlled with a foot pedal, leaving both hands free to guide the aluminum.
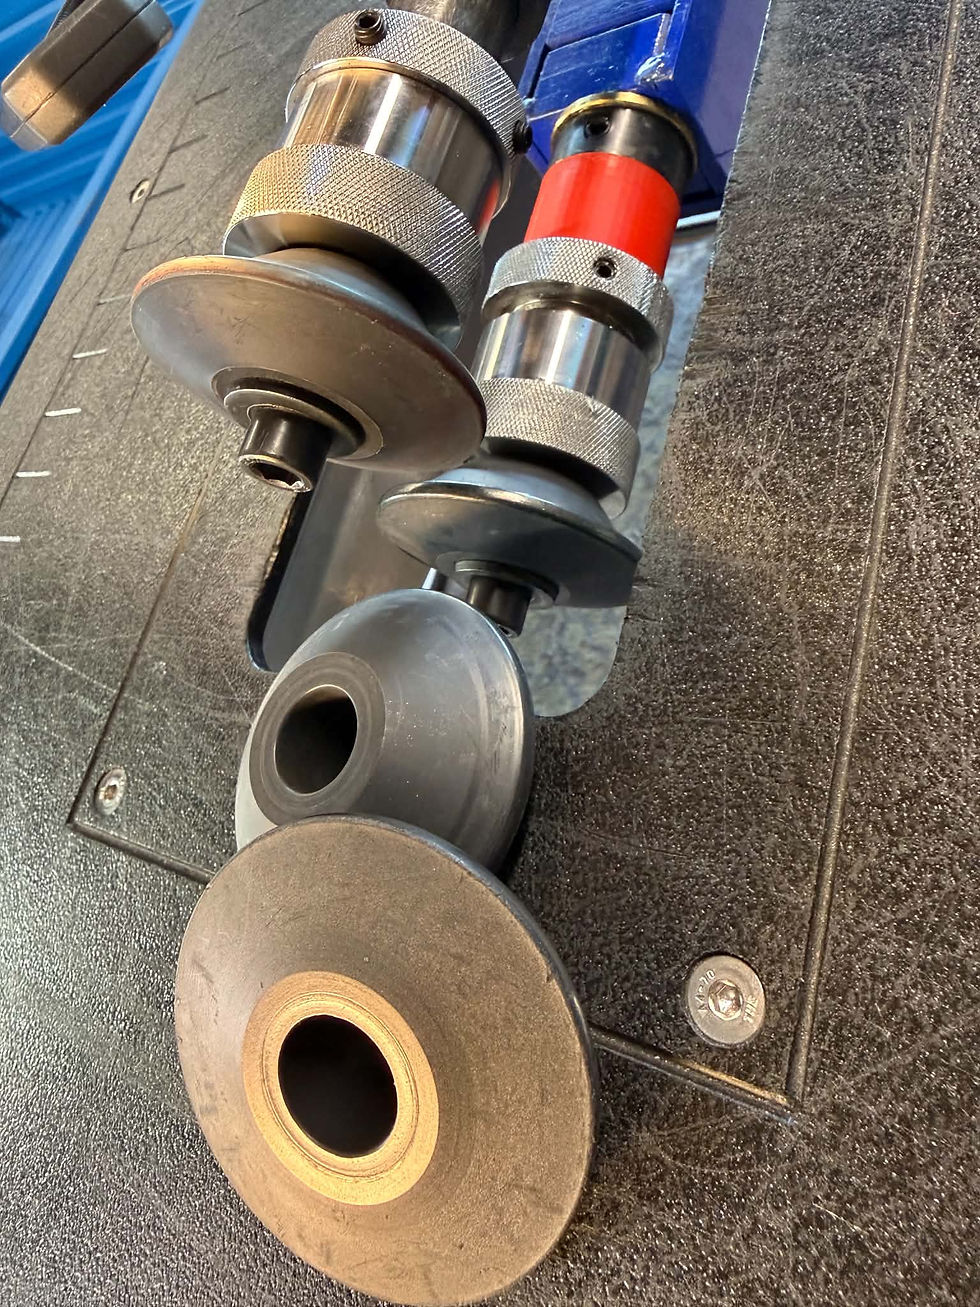
For most of my designs, I use stencil dies made from Nylatron, a nylon-based material that doesn't gall the aluminum while I'm rolling out the design.
I have several sets of stencil dies from both Eastwood and Mittler Brothers. Eastwood has the better price but I find the Mittler Brothers dies give a little better visibility on inside turns because of their shape.

Rolling the Design
Although the bead roller is motorized, the machine doesn't trace the artwork for me. I still guide and turn the sheet by hand as it moves through the dies.
Curves, corners, lettering, and detailed areas require careful control of the aluminum while following the Sharpie lines and watching how the metal is forming.
That's why I like to think of bead rolling as drawing in metal. The machine provides the pressure and forms the bead, but I'm controlling where those lines go.
And unlike drawing with a pencil, there's no eraser or undo button if I get off the line.
What About Warping and Pre-Stretching?

Forming sheet metal can cause it to warp or develop what's commonly called oil
canning, where an area of the panel can pop back and forth instead of remaining flat.
Depending on the material and project, some bead rollers pre-stretch the metal before rolling. One tool used for this is an English wheel, which gradually stretches and shapes sheet metal between two wheels.
For the aluminum I use and the type of work I do, I don't pre-stretch the material. I set my bead roller at two and a half to three turns of the adjustment crank and start rolling. I've found that I experience minimal warpage with the 18 gauge, 5052 aluminum I use.

Finishing the Design
Once the design is rolled out, I remove the Sharpie with rubbing alcohol. Then I use an orbital sander with red Scotch-Brite pads to scuff the surface of the aluminum.
The Scotch-Brite doesn't reach all the recessed areas between the beads, so the process leaves different finishes across the aluminum. That contrast helps the bead-rolled design really stand out.

Adding Mounting Holes
Mounting holes are optional and depend on what the customer wants. When requested, I typically drill them in the corners. I then use dimple dies from HammerFab and an arbor press to form a raised feature around each hole. This gives the mounting holes a more finished appearance and adds another formed detail to the piece.
Give It a Try
If you've ever thought about trying bead rolling, the only way you're really going to know if you can do it is to give it a try.
When I bought my bead roller, I didn't know how to do any of this. I didn't know if I'd be good at it or even if I'd be able to do it. I went out on a limb, bought the machine, got some great tips and advice from people who had been doing it a lot longer than I had, and went for it.
Like anything else, it takes practice. You're going to make mistakes, and you're probably going to ruin some metal along the way. But that's part of learning. If bead rolling is something you've been wanting to try, get some material, start with something simple, and see where it takes you.
And if you're not looking to do it yourself, that's where I come in.
A vision is just the beginning. Tell me your idea, and let's bring it to life in metal.


Comments